


To stop a website sending fake virus alerts on your Mac, open Safari → Settings → Websites → Notifications. Find the site and change Allow to Deny. Safari can deliver website alerts even when it’s closed. You can block just that sender and keep the notifications you want.
To identify the sender, click the date and time in the menu bar and read the sender line on the notification without opening it. You can also find website senders in System Settings → Notifications. A warning inside a tab usually ends when you close the tab. A website can choose the headline and logo that appear on a desktop banner.

Did you install or run an app from the alert?
Run a free Quick Scan with 67 Cleaner and review any flagged files. Threat quarantine is included in the seven-day trial and Premium.
Is the “MacOS Is Infected – Virus Found” notification real?
A scam notification may say “System Mac OS is infected!” and ask you to take action to restore the system. A website with permission to send notifications can display that message without checking any files on your Mac.
If yours uses a different logo or claims a subscription has expired, look up the sender the same way. A genuine macOS warning about opening a particular app appears when you try to open it. For an alert claiming to come from a security app, open the installed app independently and check its own findings.
Block the website in Safari
- Click the date and time in the menu bar to open Notification Center. Read the sender shown with the warning. Avoid the message, its phone number and any button offering a scan or renewal.
- Open Safari → Settings → Websites and select Notifications in the sidebar. On older versions, Settings is called Preferences.
- Find the website and change its permission to Deny. Compare the whole domain. The headline may use the name of a company that has nothing to do with the sender.
- If you also want to stop new permission prompts, deselect Allow websites to ask for permission to send notifications. Review permissions already marked Allow separately.
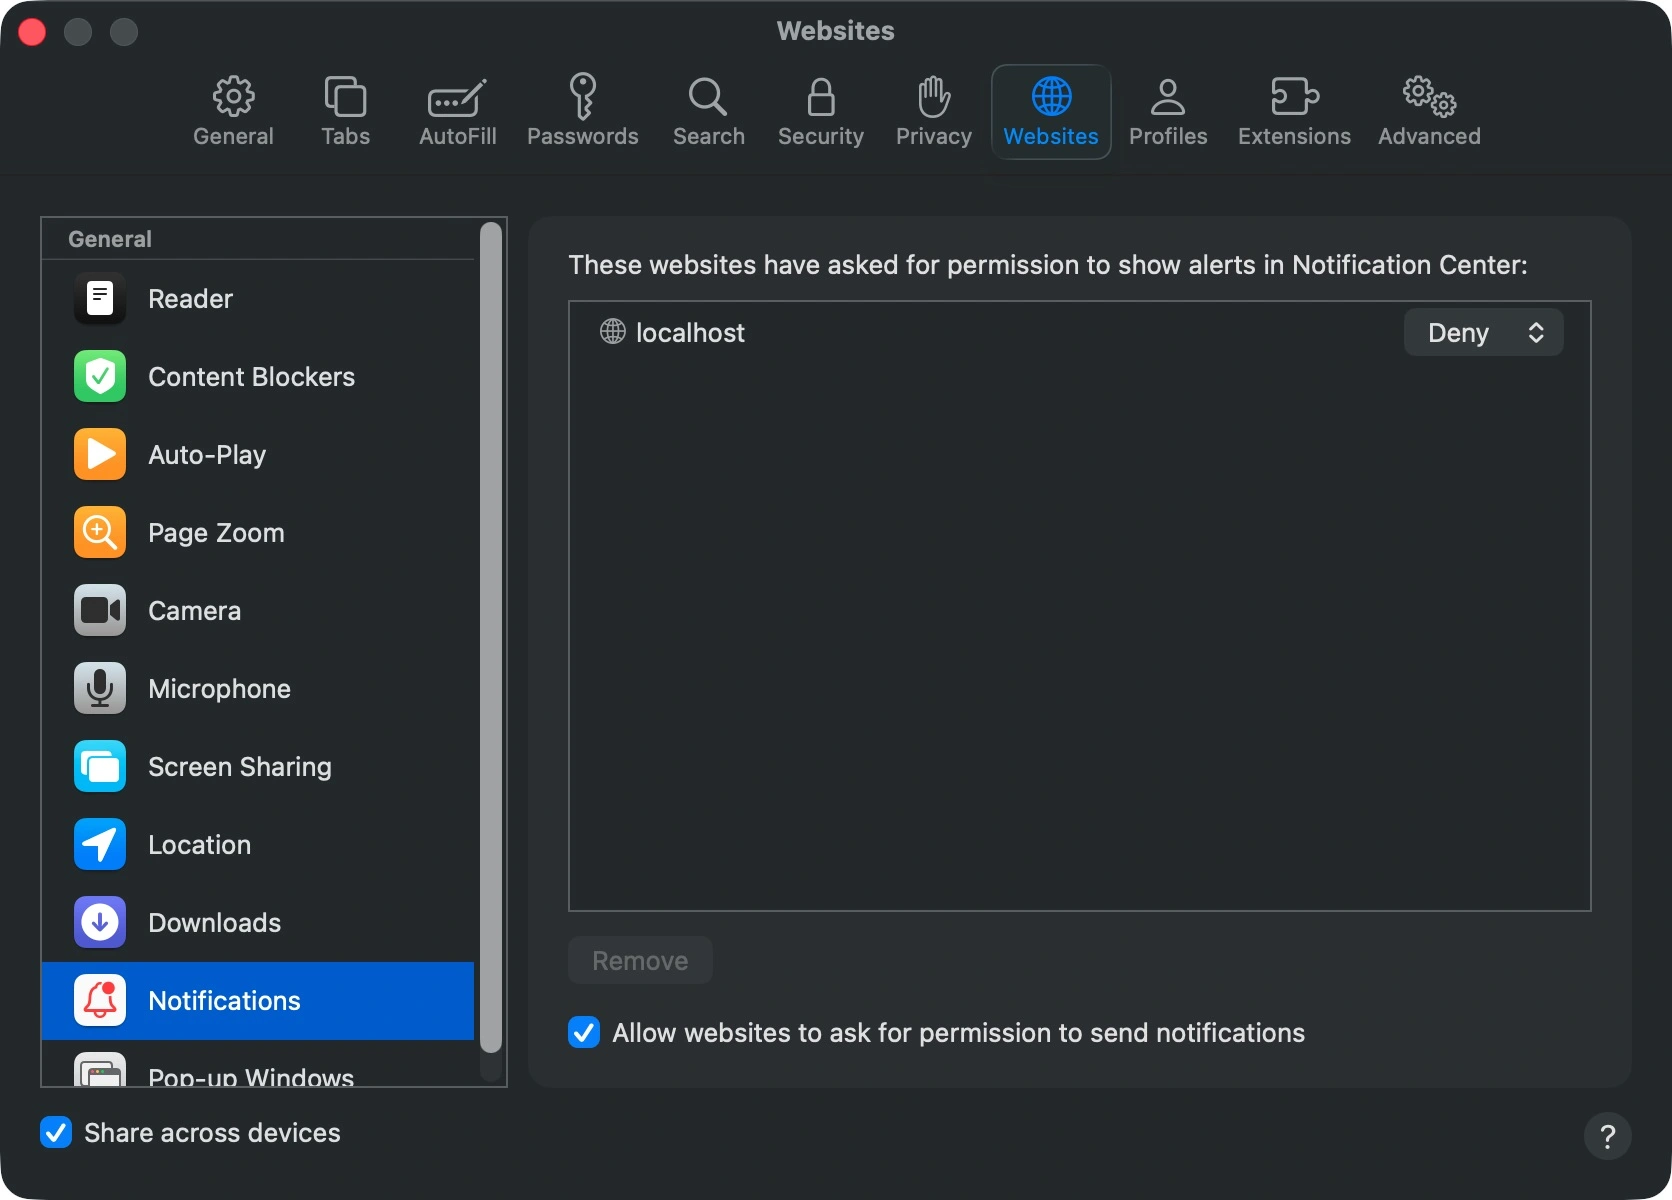
On a test Mac running Safari 26.6.2, we changed the local test site to Deny. When the page checked its notification permission again, Safari returned denied. To turn off banners at the system level, you can also select the website under System Settings → Notifications and switch off Allow Notifications.
Dismiss the old messages from Notification Center. Previously delivered messages can remain after a permission change. If another one arrives, compare its sender with the one you blocked. Two sites can use the same artwork.
What if the sender isn’t listed in Safari?
A Chrome notification. Open Chrome yourself and enter chrome://settings/content/notifications in the address bar. Under sites allowed to send notifications, use the menu next to the matching domain and select Block. Check the browser profile in which you granted permission. Our browser notification guide covers other browsers.
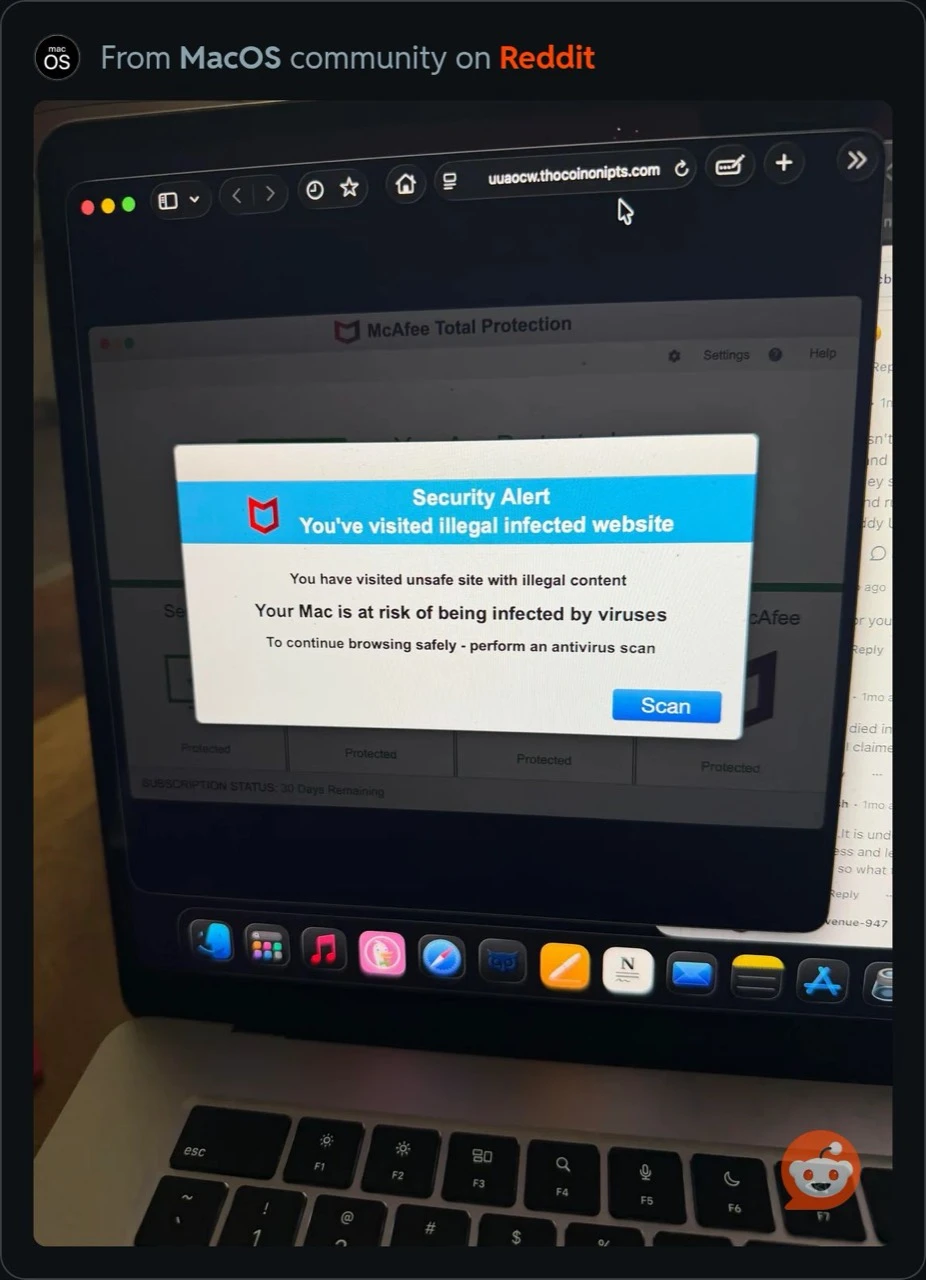
A warning confined to a tab. The photo below shows a webpage imitating an antivirus scan. You can see the browser’s address bar above the warning. Leave the blue Scan button alone and press Command-W (⌘W) to close the tab. If Safari reopens the same page after you quit, hold Shift while opening Safari. If searches you start yourself keep going to another engine, check the guide to Search Marquis redirects. Website notification permissions and search settings are separate controls.
An alert attributed to an installed app. Open that app from Applications and read its own status or history. For a warning about your Apple Account, open System Settings yourself to check the account. This gives you a route back to the source without using a link inside the warning.
What did you do after the alert appeared?
- You saw the alert, clicked Allow or opened the page. Close the page and revoke the site’s permission. If you clicked through, check your browser’s Downloads list for an unexpected file.
- You downloaded a file without running it. Move that download to the Trash. You can do this directly in Finder without opening the file.
- You installed or ran the offered app. Review Applications, browser extensions and login items. Use the Mac app and login-helper removal steps for software you can identify. If you also granted system permissions, check the affected permissions as described in our fake macOS toolkit investigation.
- You entered a password or shared a verification code. Go directly to the real service from a trusted device, change the password and review signed-in devices. Change any other account that used the same password.
- You entered card details or paid. Call the bank using the number on your card or in its official app, even if no charge has appeared yet. If you granted remote access, end the session, disconnect the Mac if someone still controls it, and contact your IT support.
References
- Apple. Customize website notifications in Safari on Mac. Accessed November 20, 2026.
- Apple. Recognize and avoid social engineering schemes including phishing messages, phony support calls, and other scams. Accessed November 20, 2026.
- Google Chrome Help. Use notifications to get alerts. Accessed November 20, 2026.